Install the firmware
You write HyperLED to the ESP32 once over USB. After that, updates work over Wi-Fi from the web interface.
The installation has three steps: flash the firmware, flash the web interface, connect to Wi-Fi. You can skip none of them.
What you need first
- Visual Studio Code, free from code.visualstudio.com.
- The PlatformIO IDE extension for VS Code (search for "PlatformIO IDE" in the Extensions view). The first start downloads some tools, which takes a few minutes.
-
The HyperLED source code: either click Code → Download ZIP on the repository page and unpack it, or use Git:
git clone https://github.com/KaelanTesseract/HyperLED.git
-
Your ESP32-S3 connected to the computer with a USB data cable.
The releases on GitHub contain the files for the online update. The first installation always goes through the source code, as described here.
Step 1: flash the firmware
The firmware is the program: Wi-Fi, LED control and the web server.
- In VS Code choose File → Open Folder and open the
HyperLEDfolder. - Wait until PlatformIO has finished loading (see the status bar at the bottom).
- Click the → (Upload) arrow in the blue bottom bar. PlatformIO builds the firmware and writes it to the ESP32. The first build takes a while.
Or in a terminal inside the project folder:
pio run -t upload
If the upload cannot find the board, try another USB cable, then put the board into download mode: hold the BOOT button, tap RESET (or plug in the cable while holding BOOT), then release BOOT and start the upload again.
Step 2: flash the web interface
The web interface (the pages you see in the browser) lives in the data folder and is written to a separate memory area of the ESP32 (LittleFS).
If you forget this step, the ESP32 starts and joins Wi-Fi, but the browser only shows "Not Found" or an empty page.
- Click the PlatformIO icon (the alien head) in the left bar of VS Code.
- Under Project Tasks → esp32-s3 → Platform click Upload Filesystem Image.
Or in the terminal:
pio run -t uploadfs
Step 3: first start and Wi-Fi
After both uploads the ESP32 restarts and sets up its own Wi-Fi network, because it does not know your home Wi-Fi yet.
- On your phone or computer open the Wi-Fi list and connect to HyperLED-AP (it has no password).
- A setup page opens by itself ("captive portal"). If not, open http://192.168.4.1 in your browser.
- Choose your home Wi-Fi from the list (Scan for networks), enter the password and save.
- The ESP32 restarts and joins your Wi-Fi. Reconnect your phone to your home Wi-Fi.
HyperLED works with 2.4 GHz Wi-Fi. A 5 GHz-only network will not be found.
Open the web interface
Open one of these addresses in a browser on a device in the same network:
- http://hyperled.local (macOS, iOS, Android, Linux)
- http://hyperled (Windows)
If neither works, look up the IP address of the device "hyperled" in your router's list of connected devices and open http://<that address>.
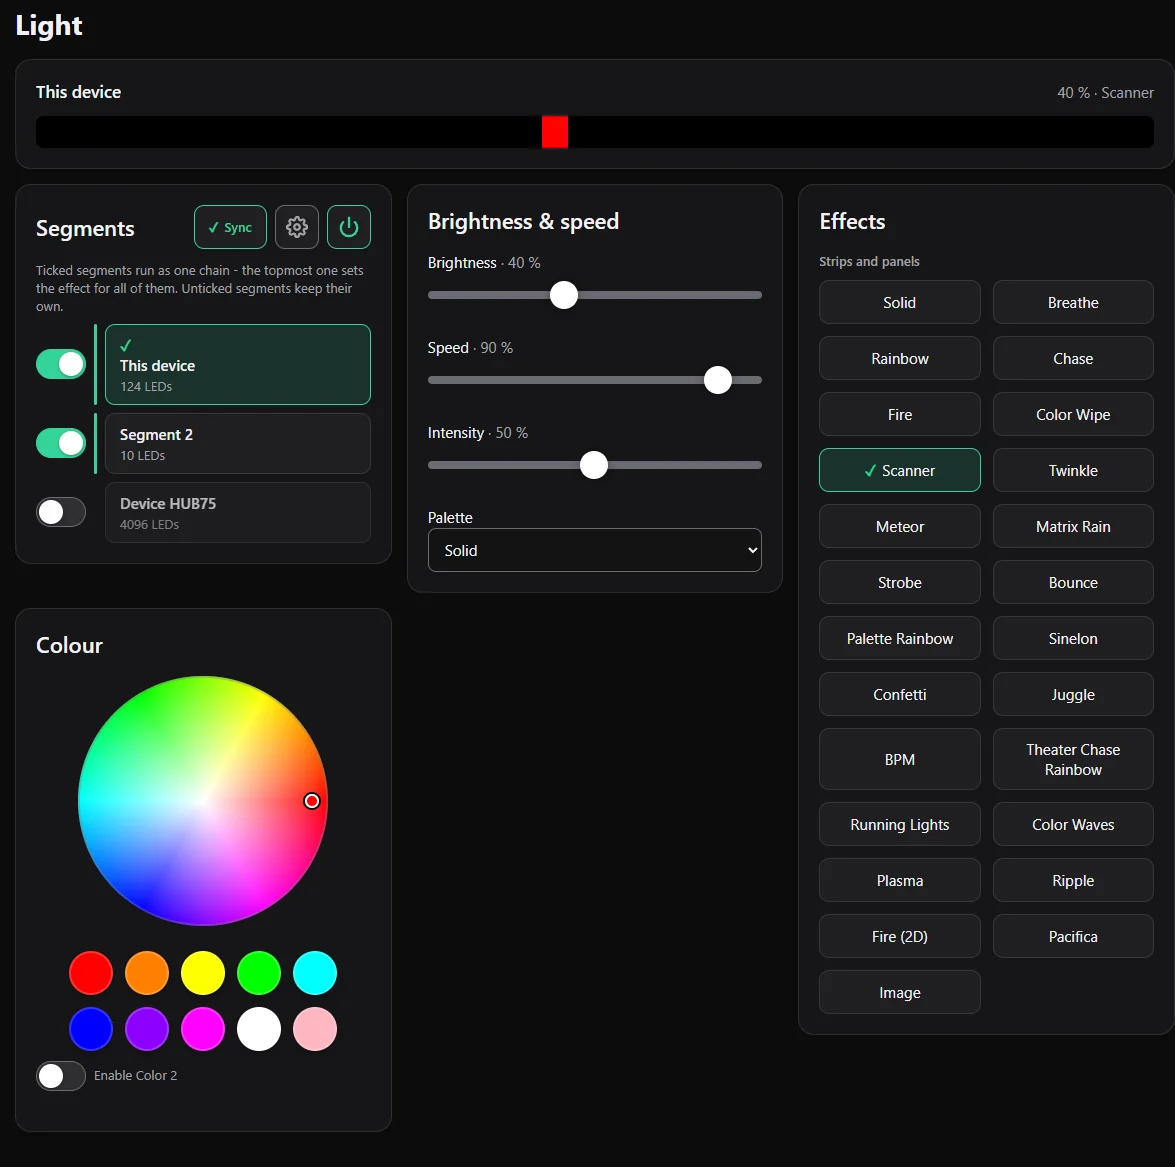
You should now see the HyperLED web interface:
Tip: add the page to your phone's home screen to start it like an app.
Next step
First light: tell HyperLED which LEDs you connected.